
Fangame Tutorials: Mapping Routes
A tutorial on the basics of Route mapping, with three in-depth examples to go along with it.
Example Three: A Mountain Path

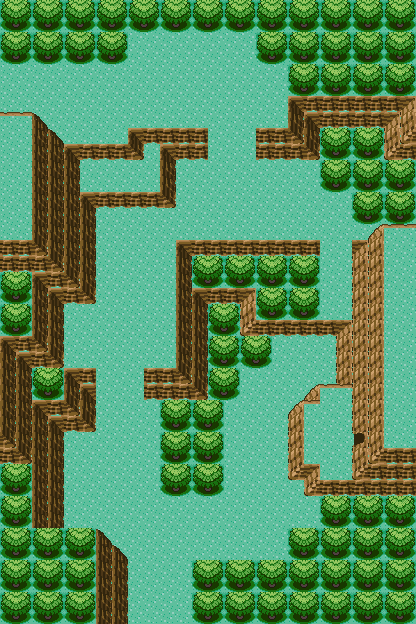
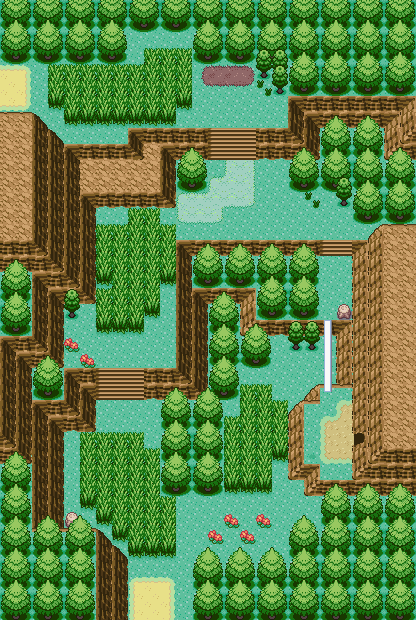
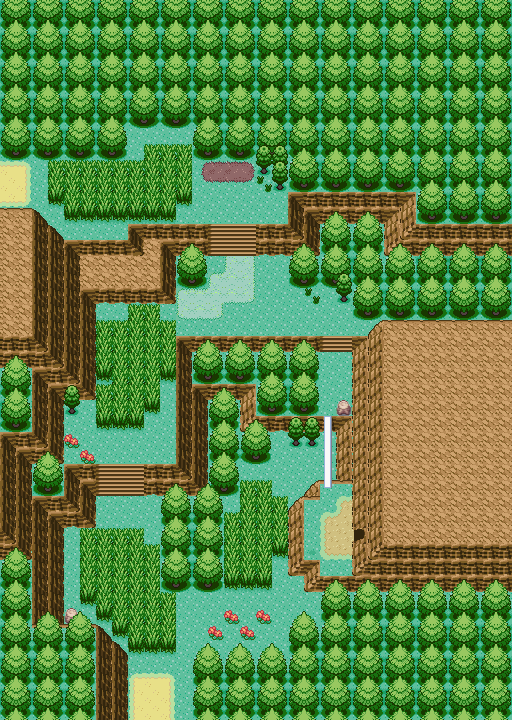
Our final map is a vertical route with dimensions 26 x 39. As we learned about rivers in Example Two, this time we’ll be learning about mountains. Mountains can be used to create interesting terrain and elevation changes, but it’s important to use them correctly. Let’s have a look at our map with the mountains alone first.

It may look complicated, but let’s break down what’s been done here. Note that the gaps in the mountains denote places where we’ll insert stairs or trees later – we’ll come back to that.
Using mountains effectively takes a lot of practice and can slow down the mapping process a lot, but it’ll be worth it in the end. As you take the time to practice you’ll develop your own style of mapping with mountains, but it may be some help to have a look at the four rules I generally go by when making my own mountainous maps:
- Mountains may not cross each other. Directly crossing creates a tile error.
- Mountains should not be straight. The exact level of curvature, as with water, is up to the mapper, however some amount is necessary.
- Mountains cannot abruptly stop; they must either go off the map or meet up with another mountain. The places in this picture where our mountains seem to stop abruptly are just the spots we’ll be inserting stairs later.
- Mountains typically should not be stacked more than three or four tiles high. You’ll notice that most of our ridges are 2 mountain tiles high – occasionally they split off into one-tile ridges or merge into three or four tile ridges. Any more than that doesn’t generally look good.
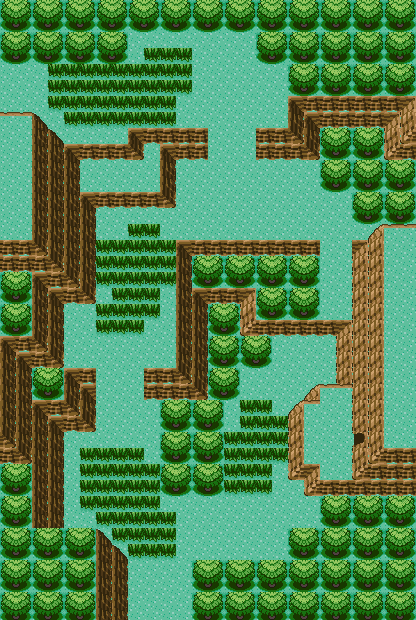
We’ve focused specifically on the mountains for the purposes of demonstration, but it’ll be easier to understand the map as a whole if we throw in the trees to. Let’s move on.
The map is traversed from bottom to top. It’s rather short, but has a side cave the player will be able to explore by biking over a white rail on an Acro Bike. There aren’t any spots to put ledges, but that’s okay – as this is a mid to late-game map, the player will have obtained the Fly HM by this point, and won’t be venturing back over Routes on foot too often.
When you’re considering whether to include a certain feature like ledges in a particular map, consider where the player will be at this stage in the game and whether they’ll even need to make use of that feature.
As with our previous maps we’ll progress to adding tall grass now.
The structure of our maps is now complete and we’ll start adding the decorations.
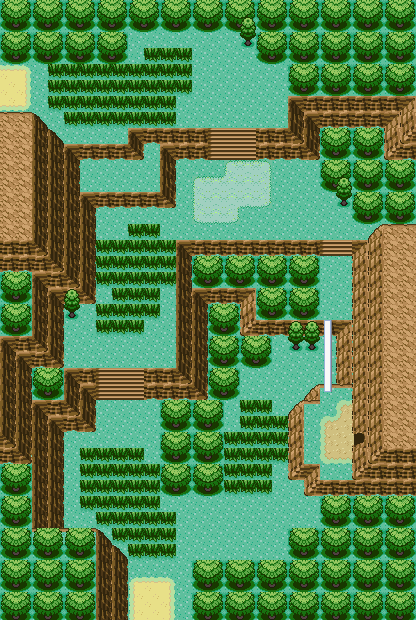
This should be fairly routine by now, though we’ve added in two previously unseen tiles here – the white rail to allow the player to access the cave if they have an Acro Bike, and the dusty terrain around the cave entrance. The latter is something I’ve always found to be a nice touch because it creates the impression of rocky and uneven terrain as the player approaches the cavern.
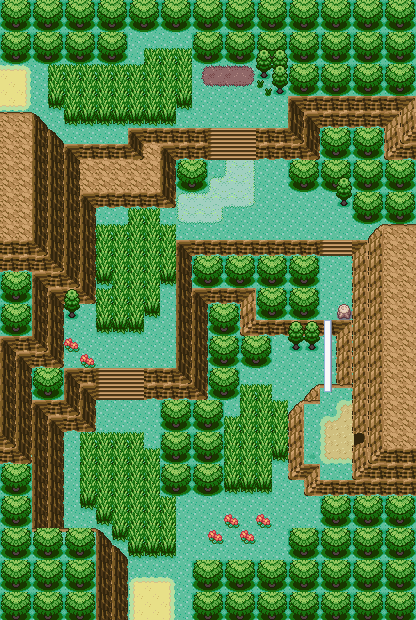
You’ll notice a few things have been revised. The rather circular grassy path at the center has been thinned out and made less round, as would be appropriate for a trail worn into the grass. A berry patch has been placed at the top of the map to fill the space there and to give the player a nice reward of a few useful berries for completing the map.
As usual we’ve tried to add patches of weeds, stumps, and flowers to fill up the empty space a bit. I generally put the flowers in diagonal rows of two to four, and hide the weeds and stumps in empty corners.
This is our final product. Let’s pad out the map and then we’re done all three of our Routes!
Conclusion
There’s a lot that goes into Route mapping, and making a comprehensive list of every little rule and style would be impossible – instead of massive list I’ve tried to give some basic rules and then describe my thought processes as I make three varied maps. Hopefully this will give an impression of what’s going through my head when working on parts of a map, and can be an effective stepping stone for you to begin making maps of your own.
If not, feel free to leave feedback! We’ll return next time with Fangames Tutorials: Mapping Cities.
Edited by 5qwerty and Z25.