
Fangame Tutorials: Mapping Routes
A tutorial on the basics of Route mapping, with three in-depth examples to go along with it.
Example Two: Riverside Forest Trails

This map is a bit larger, at 40 tiles by 30 tiles, but will still be relatively small. It will be an early to mid-game route, and thus have a fairly simple layout while still being more advanced than the previous example.
We’ll be including a river, two secret areas for the player to access later, a forest entrance that the player must enter, and a hidden item. Let’s quit staring at an empty canvas and get started!
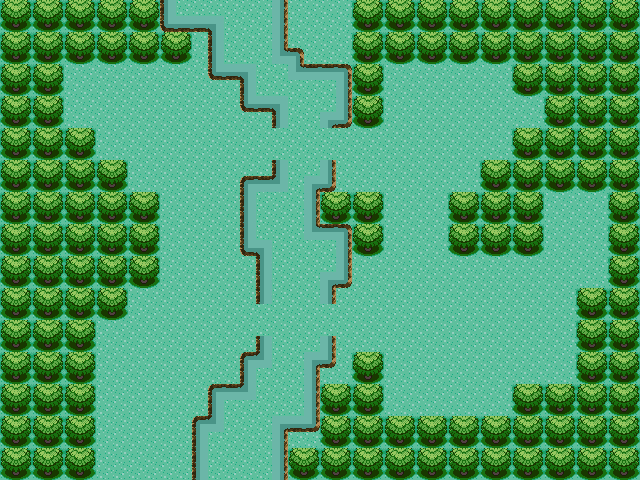
As with the previous map, we have a two-path system. The player enters from the bottom left and exits at the top left, so the route will initially force them around the longer route. Once they’ve braved the dangers of the forest, we’ll allow them to take a shortcut on their return.
The map is naturally divided by the river. Notice how twisty the water is; unlike our straight rows of trees, rivers (and as we’ll see on the next page, mountains) should never be arranged in completely straight lines. There’s no exact level of curvature required but the river in this tutorial is a good approximation to aim for.
The gaps in the river edges denote the locations we’ll be placing bridges later. The player won’t be able to Surf by this stage in the game, so we’ll need to give them somewhere to cross. If they return with Surf later, they can Surf to the north and access a secret map.

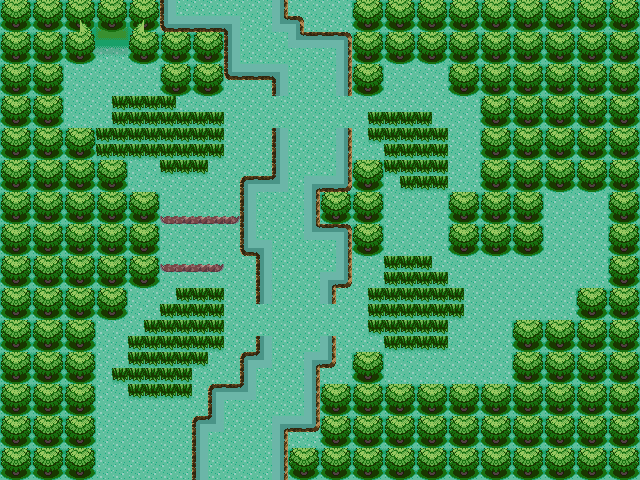
We’ve added our grass patches and the forest entrance. The map layout is starting to make more sense, but let’s clarify it even further by adding in the ledges along the western path.
Alright! Layout’s done once more, now for the details.
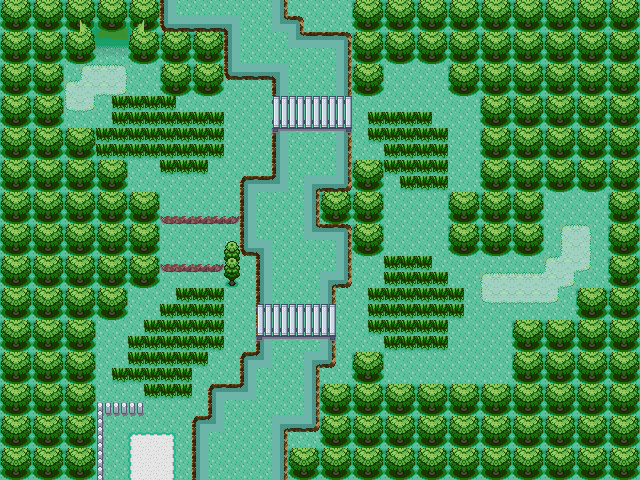
Visually we have a rather similar style to the last map, as we’re filling up space with paths, small trees, and later flowers and shrubs. We’ve also added in our two bridges, which are recolored from FireRed & LeafGreen’s light brown to better match our palette.
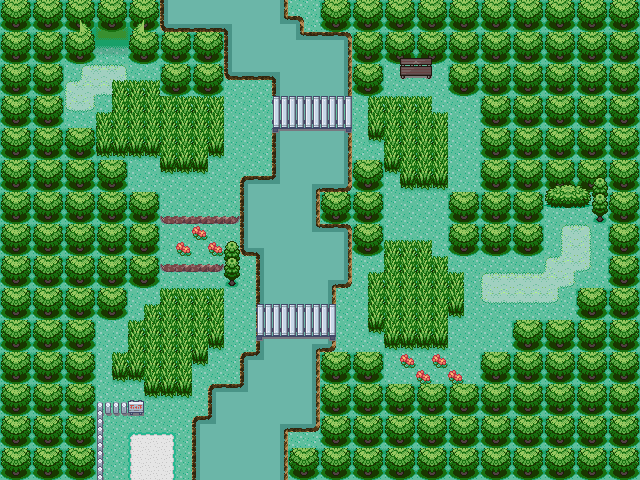
Now we’ve added more details – flowers, a secret base, a wooden bench, and proper tall grass. Putting a triangle of flowers in between ledge tiles is a look I particularly like, and we’ve also got a quadruplet of them in a nook in the trees.
The secret base is the second of the two secret areas in this map, the first being the additional map accessible through surfing up the river.
The bench is there due to this Route’s proximity to a large city, directly to the South. As this is a short and pleasant route, it makes sense to have a few NPCs from the city around enjoying the area, and we’ve made them someplace to sit.
We’ll show off the large city that this Route connects to as Example Three of the City Mapping Tutorial!
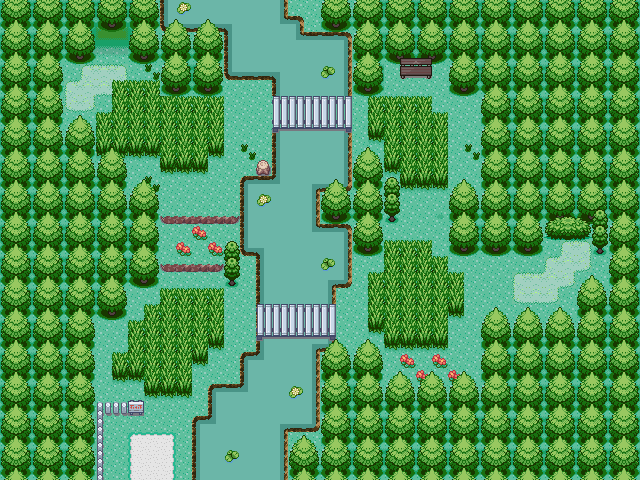
We have our finished map! A few structural changes were made at the last minute, most notably shortening the secret base offshoot by two tiles to reduce empty space a bit. Don’t be afraid to revise parts of your layout even once you’ve progressed past the layout stage of mapping – no part of your map is set in stone.

And of course, we’ve padded the map to the sides just like the previous map. There’s no need to pad the top or bottom due to the being map connections in both of those directions.
Let’s move on to map three!