
Fangame Tutorials: Mapping Cities
Building off the Route Mapping tutorial, we’ll take a look at the tips and tricks for creating your own city maps, along with three in-depth examples.
Example Three: A Metropolis

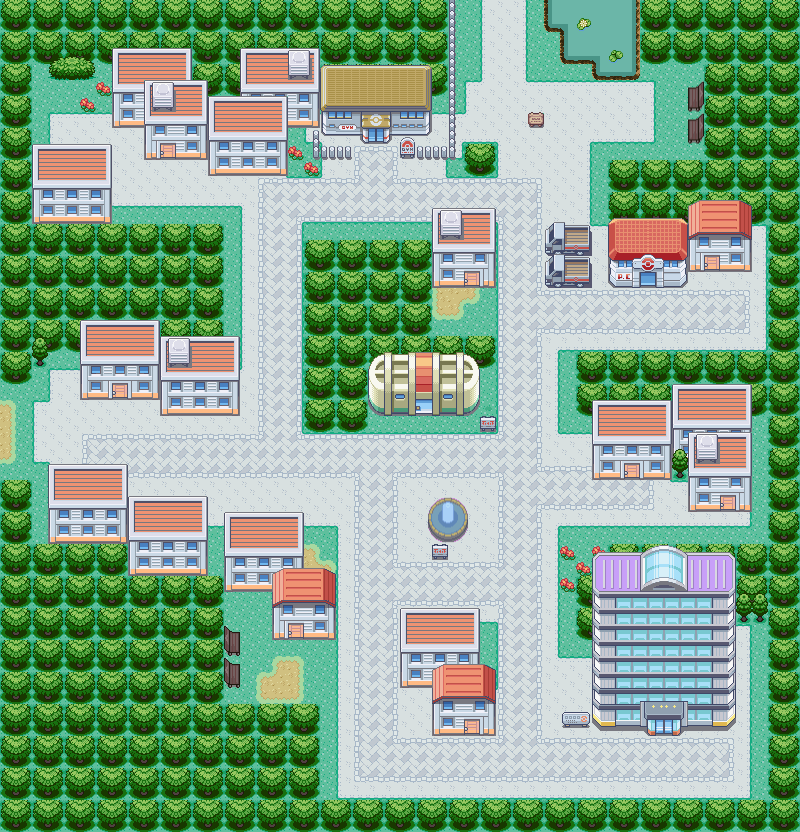
We’ve had to zoom out. This map is huge, and won’t fit onto one screen, but the mapshots have been zoomed in to compensate. In this final example map, we’ll showcase a few new techniques only suitable for use in large cities, but we’ll also be making use of everything we’ve learned in previous examples as well as the previous tutorial.
If you’ve been following along and practicing on your own, you should have a pretty good grasp of basic to intermediate mapping by now, so let’s talk about a few advanced things.
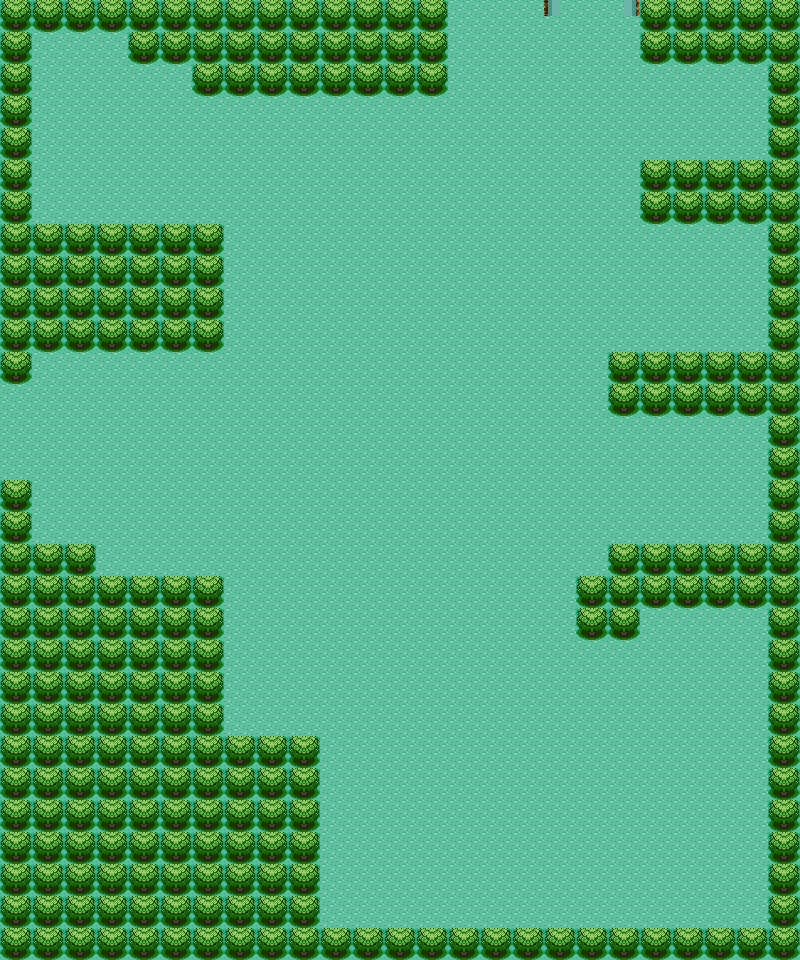
Even after filling in the bottom left corner, there’s a preposterous amount of free space here, in practice we won’t be able to use it all. We’ve split the right side of our map into four distinct sections by adding trees jutting out as dividers, each section is larger than the one above it. This is a nice way to fill space in large cities and give us a logical place to put down our buildings – against the trees – rather than letting the grid system dictate everything. Even in a metropolis, we want traces of irregularity.
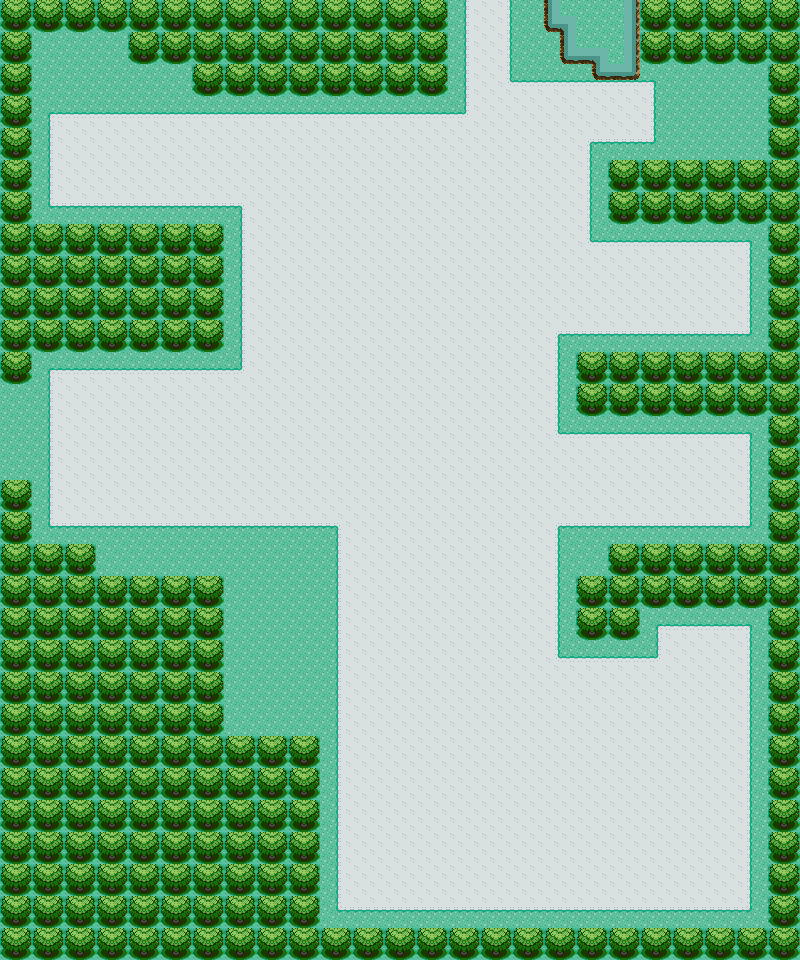
“What the heck is this? Why is the road huge?” you may be asking. For large cities, this is a useful thing to keep in mind and something you’ll see employed in official metropolis maps like Saffron – we’re using two layers of road. The first will be pavement that all our buildings will be placed on, and on top of it we’ll build a “real road” to connect them. It looks pretty ugly now, and will until we’re done, but let’s proceed.
We’ve also capped off the Route 2 river in a nice pond. Later we’ll add some space by it for people to come relax or go fishing.
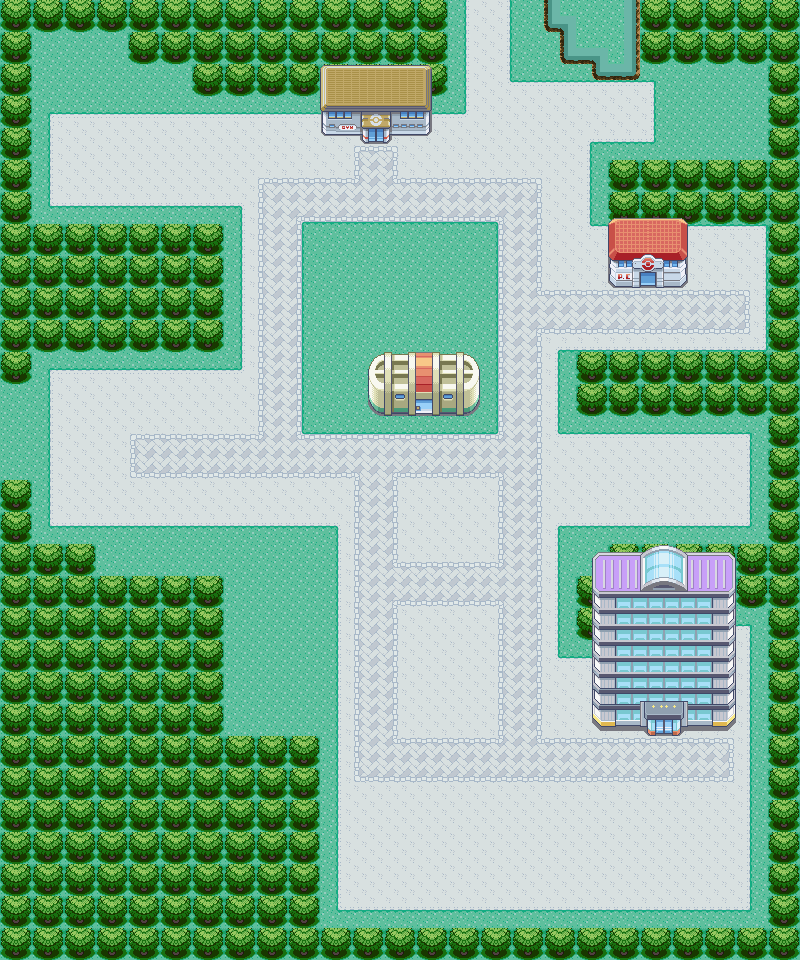
Like we did in the previous example, we’ve placed our primary buildings – a Pokémon Center, a Gym, a Lab, and some corporate headquarters akin to Silph Co. In a map of this size, four primary buildings is a good bet, especially given that they’re roughly evenly distributed around different parts of the map. For example, removing the headquarters building would eliminate the purpose of the entire lower part of the map. When deciding what primary buildings to assign to each city, take care to choose a number that won’t make the map feel too cramped with things to do when playing, but also gives the player good cause to explore each part.
Our proper road system has been placed down too. Though we’ll extend it a bit later, it remains fairly minimal and won’t run the length of the pavement, but instead will mainly connect to the primary buildings.
Finally, you’ll notice the large chunk of the pavement that’s been removed around the Lab. We can place some trees into this spot in the next step to fill some more space around what would otherwise be a tough to fill central chunk. Having a large natural venue near the center of a real life city isn’t exactly unheard of – see Central Park.
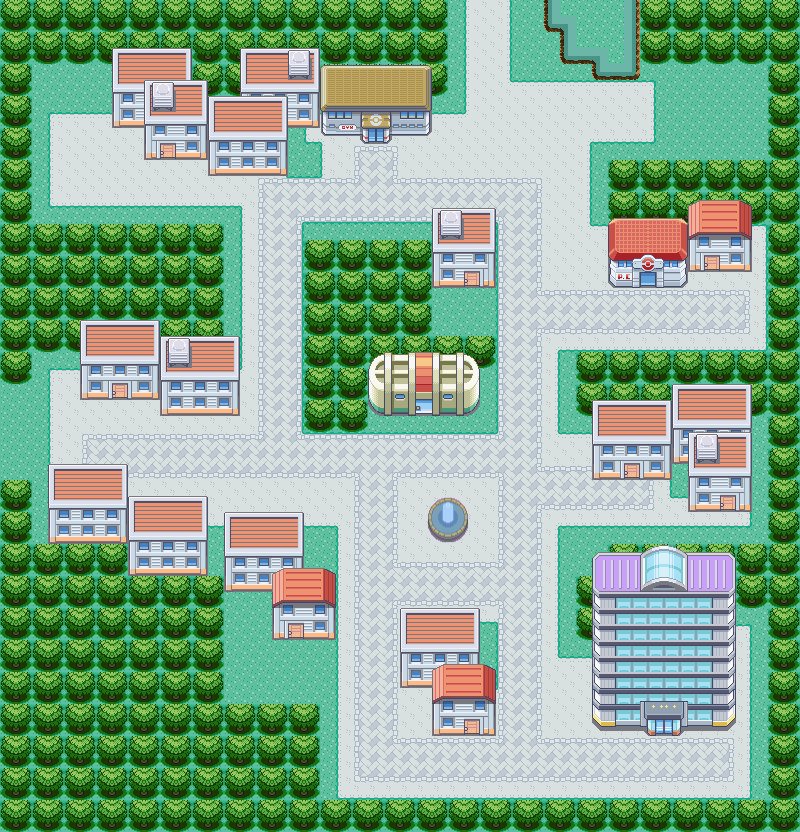
Now for the buildings. We’re using Saffron City tiles for our secondary buildings, but recolored white to match the pavement. They also have red doors, roofs, and accents to match similar accents on the Lab and Pokémon Center. As this isn’t a tile-making tutorial we needn’t go too much into this, but having a unified color scheme will certainly help your city maps.
Returning to the mapping, you may notice the prevalence of buildings lacking doors, as with Saffron City in the official games. There’s an important reason for this, and it’s not just lazy unwillingness to make a bunch of interior maps. The reason is that in a metropolis, unlike any of our previous cities, we’re using buildings not only as points of interest, but as ways to fill excess space. In the previous map, for example, the buildings were the focal points of the map and we filled the space between them with roads, trees, and decorations.
In this city, however, there are far too many buildings for them all to be focal points. We place our primary buildings and then pick out a few key locations for secondary buildings with doors, of which we have seven in this map. The rest of the space, we fill with filler buildings that the player doesn’t need to access. This is the philosophy behind leaving some houses without doors.
The map has also lost a lot of area. The empty lot of concrete below the headquarters building has been cropped out. Remember that the size of your maps aren’t set in stone; if you have excess space along the edges then shrinking the map is a fine solution.
Moving to a few remaining details, we’ve placed a fountain on the empty city block underneath the Lab. We’ve also left the top left corner totally empty. Something semi-secret will be placed there later.
At the penultimate step, we’ve begun to add decorations, which is really enjoyable in a huge map like this as there are so many places to place some fun touches. Notice from the previous steps that there are several places around buildings where the pavement breaks in an irregular shape and is replaced with a few grass tiles, this is intended to play the role of small gardens maintained by the inhabitants of those buildings.
Wooden benches, as already shown in our second Route map, are used in two different places here: the top right near the river, where people could come sit down by the water on a nice day, and the bottom left near the cluster of buildings.
The Pokémon Gym is fenced off to keep it slightly divided from the main population of the city and to establish it as an important location. We’ve also added another building at the top left to fill space and make it a little harder to spot or access the Secret Base that’s also been placed in that location.
Several patches of dirt have been added near residential buildings. When in-game, their nature is somewhat ambiguous, as they could be marks of construction, or used to denote a well-worn path, or as a sandbox-style playground for the children living in these buildings. When mapping, feel free to use them for any of these purposes.
Besides those listed above, we’ve made use of some of the decorating techniques described earlier in these tutorials. Let’s do a bit more decorating and fix our trees to wrap things up.
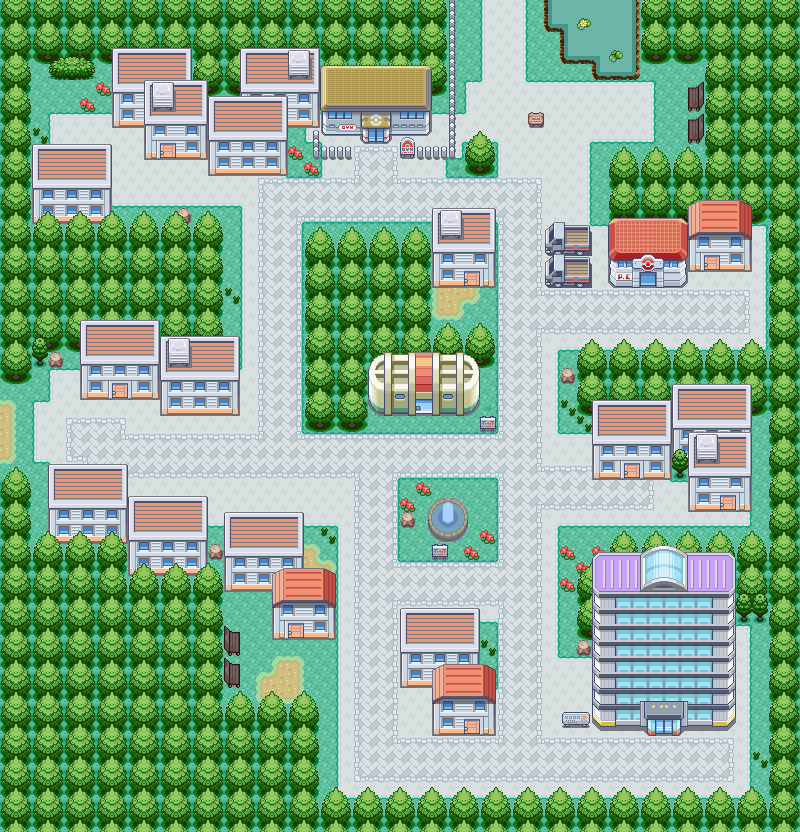
Our map is now complete! We’ve added some shrubs and logs around the small empty areas, and made some simple changes such as removing the pavement around the fountain so that some flowers can be added near it. As always, the map looks a lot better now that we’ve properly shaded our trees and added treetops.
Conclusion
This concludes the mapping tutorials. As with before, the goal hasn’t been to provide a definitive list of rules, nor to show off how to make advanced or complicated maps. Rather, I’ve tried to convey what goes through my head when designing and decorating maps, so that you can emulate the process and add your own ideas to come up with your own style.
If you have, you should have a pretty good understanding of how to make basic to intermediate maps, but you’ll need to continue practicing and get feedback to improve. Two great places to do that are the Map Showcase and Review thread on the PokéCommunity Forums, and the #mapping channel on PokéCommunity Discord. You won’t improve working in a vacuum, so be sure to give those a try!
Edited by Rabinov and Radiating.