Mantine Surf Guide
Learn how to use a great new feature in Pokémon Ultra Sun and Ultra Moon!
Heeeey dudes! Ya’ll ready to hit the waves? It’s totally radical out there.
Okay I can’t keep fake surfer accent up. I tried though.
Anyway, this is how you Mantine Surf.
What is Mantine Surf?
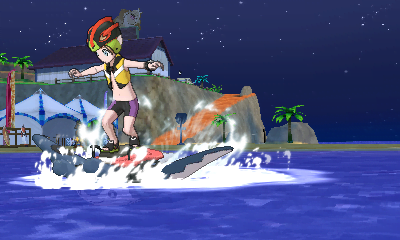
Mantine Surf is the by far the best new feature in Ultra Sun and Ultra Moon. It, as the name implies, involves you surfing on Mantine. It is initially unlocked after completing the first Grand Trial and visiting the Alola Photo Club for the first time. Basically you ride the waves between the islands, doing tricks and stuff.
Mantine Surf leaves from one spot on each island: Big Wave Beach (off Route 2) in Melemele Island, Heahea Beach (near Heahea city) on Akala Island, Ula’Ula Beach on Ula’Ula Island (connected to Route 12), and Poni Beach (adjacent to Poni Wilds) on Poni Island. Once you’ve earned the ability to Charizard Glide, you can do so to any beach you’ve already visited.
It’s worth noting that you also pick a “destination” when you begin surfing, and you end up at that respective beach. The available destinations are adjacent islands, so from Melemele you can go to Akala (initially) or Poni (once reached in main story).
There are 4 different “courses”, each departing from one island regardless of destination. The “Normal Course” departs from Big Wave, “Super” from Heahea, “Hyper” from Ula’Ula, and “Master” from Poni (this directly mirrors Pokémon Contest ranks from every game where there have been contests). Each is longer and has more annoying things to run into than the last.
Basic Guide

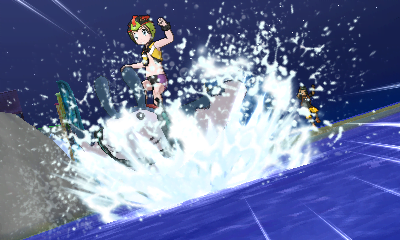
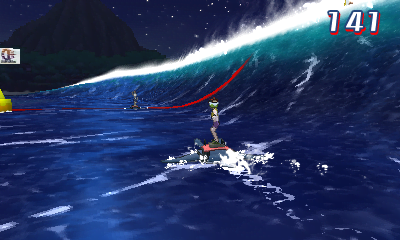
You control Mantine with the circle pad. You’re going to want to start by going as high as you can on the wave, then going down to get some speed. Repeat until you have enough speed (indicated by yellow or orange glow) to do what you want. then go off the top of the wave, and move the circle pad in various directions to do tricks.
After the jump, you need to land. This is done by doing absolutely nothing. If you’re in the middle of a trick, you drown and Mantine will save you. Successfully landing nets you a nice point bonus, you return near the top of the wave, and maintain some speed. An unsuccessful landing means you’re starting at the bottom of the wave with no speed.
Doing three or four specific tricks in a row causes a high-scoring combo. Most of these (the ones not labelled hidden on the table) are viewable from the bottom screen. Some of them need to be unlocked, however. Here are all the combos:
Move |
Special Features |
Input |
Unlock Method |
| Huntail Spiral | None | Right, Right, Right | Beginning |
| Gorebyss Spiral | None | Left, Left, Left | Beginning |
| Lanturn 360 | Gives more points on taller waves | Up, Down, Up | Become the top surfer at 1 beach |
| Primarina Twist | Gives more points on smaller waves | Down, Down, Down | Become the top surfer at 2 beaches |
| Starmie 720 | None | Right, Left, Right, Up | Become the top surfer at 3 beaches |
| Magikarp Splash | Loses value if repeated | Any 4 inputs that don’t make one of the other combos (i.e. Up, Up, Down, Down) |
Beginning (hidden) |
| Over-The-Gyarados | Loses value if repeated | Up, Right, Down, Left | Obtain Surfing Pikachu (more on that later) (hidden) |
Why do Mantine Surfing?
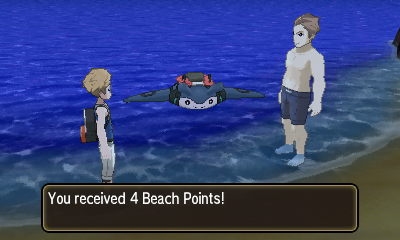
Mantine Surf nets you Beach… err… Battle Points (BP) upon completion. How many is not 100% known at this point, but it seems to cap at 10 BP. It also seems to differ by location, and I haven’t quite figured out the formula yet.
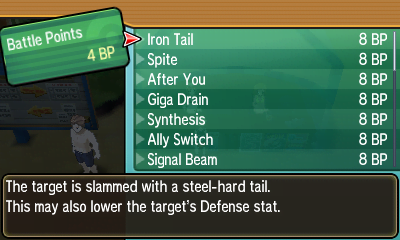
BP earned here works exactly how it does at the Battle Tree or Battle Royal Dome. You can use it on tutor moves at each beach (there are some really good ones), or to buy competitive items like Leftovers or Expert Belt once you reach the Battle Royal Dome or even Mega Stones at the Battle Tree.
Also if you become the top surfer at all four beaches, you can get a Pikachu that knows the move Surf. This Pikachu can also be shiny! Doing this unlocks the final top-secret trick: Over-The-Gyarados.
Advanced Tips
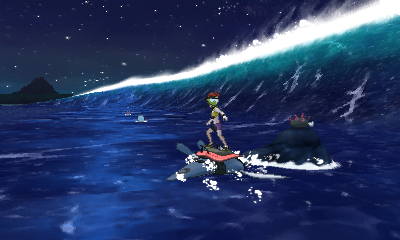
Momentum is important. The height you go off the wave is near exclusively dependent on your speed, not the height of the wave, so not losing it is crucial. To that extent, not hitting obstacles should be your highest priority. The best way to do this is to stay higher up on the wave, going above the annoying things.
The other thing that is crucial for maintaining momentum is landing your jumps. It is not worth it to go for risky tricks near the end of a jump, as you will most likely drown and that’s just more work for Mantine.
At max speed, you should be able to pull off two combos per jump; one going up, the other down. At the start, go with one each of Huntail Spiral and Gorebyss Spiral. Once you unlock Lanturn 360, if the wave is big do that both ways and the same as before for smaller waves. When you can do the Primarina Twist, do that twice on short waves. Once you unlock Starmie 720, I highly recommend doing either a Primarina Twist or Lanturn 360 on the way up depending on wave height and a Starmie 720 on the way down. This is what’s worked for me for a while.
It’s worth noting that you don’t need to be at max speed to jump. Once you’re in the yellow, you can at least get a full combo off. If you’re in an area with a ton of obstacles, don’t be afraid to do this and hope you land somewhere nicer.
If you cross the finish line mid-air, you continue until you land and get points for that jump. As such, if you cross the finish line while not in the air, that’s wasted points. Even if you’re not up to speed, you probably can still get a Primarina Twist or one of the spirals off. The other option in that situation is to Magikarp Splash if you haven’t yet.
Speaking of which, Magikarp Splash is a great safety net. It gives you one error that you don’t get punished for per run. That said, if you’re near the end of a run and you haven’t messed up yet, you can intentionally do it (I normally use Up, Up, Down, Down to pull it off in this scenario) for the one-time point bonus.
Similarly, don’t forget to use your Over-The-Gyarados once you’ve unlocked it. This is another once-per-run thing, but it’s a metric ton of points.
The most important thing to remember is to have fun and look awesome while doing it.
Goals

Well, your first goal should be beating Boss’ scores (whoever that might be) for each course to become the top surfer. These are the respective scores:
- Big Wave Beach (Normal Course) – 12,200
- Heahea Beach (Super Course) – 27,200
- Ula’Ula Beach (Hyper Course) – 43,200
- Poni Beach (Master Course) – 58,300
The other goal to aspire to on every course is 35,000, aka the 10 BP mark.
For those curious, these are my highest scores on each course so far:
- Big Wave Beach (Normal Course) – 44,740
- Heahea Beach (Super Course) – 48,683 (I need to improve this one later)
- Ula’Ula Beach (Hyper Course) – 73,577
- Poni Beach (Master Course) – 43,733 (I’m working on it)
So that’s how you Mantine Surf! Good luck out there, and mind the Wailord!
Edited by Fletch and Rabinov. Screenshots provided by Jake.
Updated 11/19/2017 19:30 GMT-5 with Poni Island info and updated BP rewards section.