The Best Pokémon for Pokémon Ultra Sun and Ultra Moon
Do you want to be the very best? This article will help you pick out the best Pokémon to use on your quest to be the top trainer in Alola!
There are over 400 Pokémon in Alola, and most of them are great! Which Pokémon are optimal for your Pokémon Ultra Sun and Moon (USUM) playthrough? This article will provide my opinion for solid choices for your team in USUM based on various criterion, but don’t feel pressured to use any of these Pokémon. It’s really up to you! But if you want the strongest or best Pokémon, you may want to consider these.
I ranked each Pokémon available in Alola using the following criteria:
- Availability – When does the Pokémon become available? How hard is it to find?
- Evolution – When and how does the Pokémon evolve?
- Stats – How strong is the Pokémon? Can it keep up against its competition?
- Typing – Is the Pokémon’s typing valuable for USUM’s trials?
- Movepool – What moves can the Pokémon utilize? Does it have good coverage? STABs? Priority?
- Major Battles – How well does the Pokémon perform in battles against the rivals, evil teams, Trials, Elite Four, and Champion (the Champion will be omitted due to spoilers).
- Other Notes – Anything unique that doesn’t fit above, such as unique abilities or Z-Moves are kept in consideration.
A few notes before we begin:
- This list is designed for a well-paced casual play through.
- These Pokémon aren’t intended to be used as a team, but rather as nice options if you are looking to fill your team with strong battlers.
- Obtainable Totem Pokémon are not considered.
- This article is purely my opinion based on conjecture. Please feel free to comment on Pokémon you think are strong!
- Warning: minor spoilers ahead!
Considering all of this, I threw all the data into my brain and figured out the best Pokémon to use in USUM! With all that said, let’s get to the list!
Popplio
- Availability – Early in USUM as a Starter Pokémon. If you want it, you can use it.
- Evolution – Level 17 to Brionne; Level 34 to Primarina
- Stats – Being fully evolved with a base 60 Speed stat is slow, but this is made up by its massive base 126 Special Attack and the fact that many Alolan Pokémon are also slow. Defensively, its physical bulk is passable and its special bulk is high.
- Typing – Initially pure Water, but evolves into the Water/Fairy Primarina. Water is arguably the best type in the game and its Fairy typing is great against late-game Dragon types.
- Movepool – The Popplio line has a pretty standard Water-type level-up movepool, and sports fantastic coverage in the late game with Shadow Ball and Ice Beam. However, it is dramatically hurt by the relocation of the Scald TM. Luckily Sparkling Aria is a solid Surf replacement.
- Major Battles – Primarina cannot solo many major battles due to Scald’s relocation, but still beats most of Gladion, Plumeria, Olivia, Nanu, Kahili, and Olivia2.0’s teams as well as being one of the best Pokémon to deal with the hardest Totem in the game, Marowak.
- Other Notes – Primarium Z makes a return, so I recommend employing it liberally if you kept Sparkling Aria on your moveset.
Caterpie
- Availability – Common on Route 1
- Evolution – Level 7 to Metapod; Level 10 to Butterfree
- Stats – Abysmal until it evolves into Butterfree, debatably worse after. Butterfree has some of the lowest stats of any evolved Pokémon
- Typing – Bug, evolves into Bug/Flying.
- Movepool – Quiver Dance, Bug Buzz, Air Slash, and your choice between Shadow Ball and Psychic (through TMs). Butterfree has great sweeping potential with its great coverage and set up move. Sleep Powder also has some good utility to give Butterfree an edge over Pokémon it would otherwise be weak to.
- Major Battles – Beats Totem Raticate, Hala, Totem Lurantis, and potentially Totem Araquanid.
- Other Notes – Butterfree has early access to the Ability Compoundeyes, which increases the accuracy of Air Slash and Sleep Powder. It also increases the chance of finding items on wild Pokémon, which can help a lot during your adventure.
Grubbin
- Availability – Route 1, etc. Fairly common.
- Evolution – Level 20 to Charjabug; Level up at Blush Mountain (NOT Vast Poni Canyon) to Vikavolt.
- Stats – Base 43 Speed is abysmal, but a base 145 Special Attack is ridiculously high.
- Typing – Bug/Electric as Charjabug and Vikavolt, plain bug until then.
- Movepool – Thunderbolt is learned on evolution into Vikavolt, which now happens so much earlier that it will likely be the first Pokémon on your team to gain access to this great move. Bug Buzz and a host of other STAB Bug-type attacks compliment this, and a passable coverage pool rounds out the set.
- Major Battles – Beats Totem Raticate, Totem Araquanid (if you’ve evolved), Totem Lurantis, Nanu, and a bunch of other strong Pokémon and trainers.
- Other Notes – Levitate is a fantastic ability that will allow you to use other Pokémon weak to Ground types.
Magnemite
- Availability – Various locations before the first trial, very common.
- Evolution – Level 30 to Magneton, Level up at Blush Mountain (NOT Vast Poni Canyon) to Magnezone.
- Stats – Base 60 Speed (as Magnezone) isn’t great, but this is Alola we’re talking about, so everything is slow. 130 base SpAtk is massive, however. Great all-around bulk as well, especially if you leave it as a Magneton and give it Eviolite.
- Typing – Steel/Electric is an amazing combo in a relatively low-Ground-type region.
- Movepool – Discharge and Flash Cannon by level-up.
- Major Battles – Beats Ilima (if you did not choose Rowlet), Totem Gumshoos/Raticate, Totem Aquarinid, Totem Lurantis, Olivia, Totem Mimikyu, Guzma, Totem Ribombee, Totem Lusamine, and Mina.
Hawlucha
- Availability – Can be found on Route 3 at a low encounter rate of 10%; however, Hawlucha is available prior to the first trial in an in-game trade
- Evolution – None
- Stats – Hawlucha is very fast and power early to mid game, but its power falls off slightly towards the end of the game.
- Typing – Flying/Fighting. A great combo.
- Movepool – Hawlucha wields a swath of Fighting and Flying moves in addition to some nice TM moves. Flying Press is also a Fighting and Flying-type move at the same time.
- Major Battles – Hawlucha has the ability to solo the entire first island. It should also be able to defeat Totem Aquarinid, Totem Lurantis, Totem Togedemaru (potentially), Guzma, and Nanu.
- Other Notes – This is simply a great all-around character.
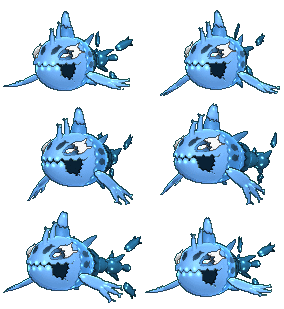
Wishiwashi
- Availability – Forced encounter in Brooklet Hill, so you might as well catch it.
- Evolution – None, although its Schooling ability activates at Level 20.
- Stats – Your Speed and HP are quite subpar, but everything else makes up for it. If you keep Wishiwashi above 25% HP, then it has base 140 in both offensive stats and base 130 in the defenses (for context, Arceus is base 120 in those stats).
- Typing – Water. Blub blub.
- Movepool – Since you’re not getting early Scald here, Brine will do fine as a substitute. Click that and nothing else for the entire game.
- Major Battles – One of the great ironies of Sun and Moon was that Wishiwashi could defeat Totem Wishiwashi by itself (basic logic: you have Scald, it doesn’t). That logic doesn’t hold here because you don’t have Scald and also there is no more Totem Wishiwashi. Regardless, if it hits Level 20 it can hold its own against Araquanid. Marowak and most of Olivia’s team are fish food.
- Other Notes: Wishiwashi’s Schooling ability is its greatest asset, but it turns off at 25% HP. Don’t let that happen if you can avoid it.
Dewpider
- Availability – Brooklet Hill; common during the Day
- Evolution – Level 22 to Araquanid
- Stats – Araquanid has good Special Defence and subpar stats the rest of the way around, but Water Bubble helps increase the damage output to the point where your actual offensive stats no longer matter.
- Typing – Water/Bug, with Water Bubble giving it a resistance to Fire type attacks.
- Movepool – Leech Life and Liquidation are the only moves you truly need, though Bubble Beam serves as a worthy substitute until Liquidation is learned.
- Major Battles – Araquanid is good against just about everything. With some Potions and a little luck, it may well be able to beat everything on the second island by itself.
- Other Notes – Water Bubble is an amazing ability. It doubles all Water-type damage.
Archen [Ultra Moon]
- Availability – Fossil purchased in Konikoni City; revived on Route 8.
- Evolution – Level 37 to Archeops
- Stats – Amazing until its ability, Defeatist, takes effect.
- Typing – Rock/Flying. Think neo-Aerodactyl.
- Movepool – Archeops can take advantage of a varied move pool even without TMs, and its access to Acrobatics greatly boosts its potential.
- Major Battles – Although Archeops is not strong against any particular Totem, captain, or Elite 4 member, you can always rely on it to deliver powerful attacks.
- Other Notes – You’re using Archeops for its movepool and stats. That said, do not let Archen/Archeops below 50% HP. This triggers the Defeatist Ability, which is one of the few purely negative abilities in Pokémon.
These are the strongest Pokémon in-game for Pokémon Ultra Sun and Ultra Moon, which are available now. That said, you certainly don’t need to use these Pokémon. The best way to play the game is to use characters you like. What are you planning to use in your playthrough of USUM?
Edited by bobandbill, BadSheep, Radiating, and SirBoglor.


