
Four Legs Good, Four Arms Better – A Guide to Machamp
Machamp is a powerful character in Pokkén Tournament. This guide will teach you how to be just as strong!
Hey trainers! Welcome to my Machamp guide! I’ve been a Machamp main since the day Pokkén Tournament released. Not to brag, but I think I’ve gotten pretty good with the four-armed fighting-type! I wrote this guide because I was bored to share my knowledge with anyone else struggling to learn the way of the fist. The guide is divided into five sections: field phase, duel phase, synergy burst, additional notes, and combos!
Before we get started, if you got the reference in the article’s title, then I sympathize you having to suffer through that boring book… Unless you enjoyed it, in which case this just got awkward…
Field Phase
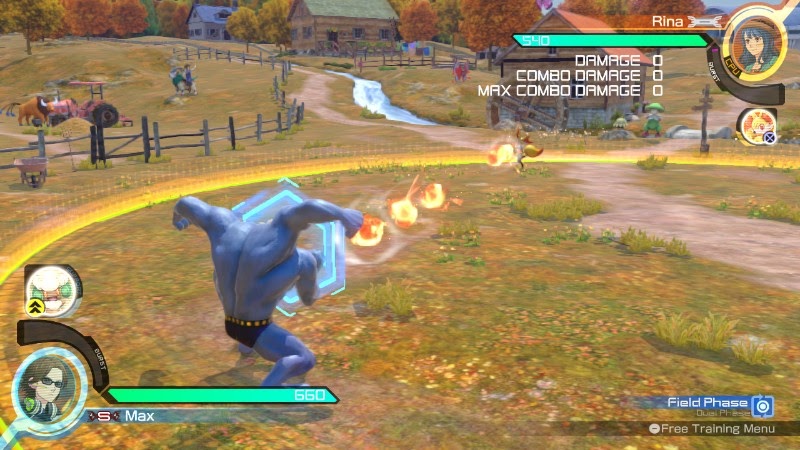
Ah, the Field Phase. This place consists of projectiles and even more projectiles. If you main Machamp, you will grow to hate this phase. Here are a few tricks to make it less hate-able.
Midair X homes in on your opponent and has very little startup-lag. Upon landing, this move shifts the match over to Duel Phase! It’s a punishable, but very effective move, and the best way to land it is to punish a projectile attack with loads of end-lag (Chandelure’s Forward Y, for example). If your opponent shields this, you’re not in a good position… You can try a counter or jump, but none of those options are able to avoid a quick attack. If your opponent never gives you the opportunity to use this move, you’re going to have to resort to your Enhanced Neutral A, Neutral X X, and Forward Y.
Machamp’s Enhanced Neutral A is an awesome move; if you thought the Midair X was fast, then just wait until you see this! Before I ramble on about the uses for this attack, you should know about Bulk Up. Bulk Up powers up each of Machamp’s A moves and changes the Neutral A into a lunge attack! Bulk Up is essential to winning battles, and it’s discussed more in the ‘Additional Notes’ section. Back to the Enhanced Neutral A, it can punish most X attacks, plenty of Y moves, multiple A attacks, and – well, you get the point. It’s worth noting that this move has even more range than Machamp’s projectiles. The only downside to this incredible move is the slight end-lag after the attack… A way to ensure this move hits is to use a Back Y –> Enhanced Neutral A combo!
Neutral X X is only somewhat reliable. The attack makes Machamp run towards his opponent, but he moves slower than… umm… something very slow. When he finally reaches his opponent, he slams his fist down and switches it to Duel Phase. If your opponent shields the first hit, hold X to break their shield with the second hit. Honestly, this move is not the best and shouldn’t be used too often, but it works as a good mix-up move and disposes of foes whom shield excessively.
You’ll need to get close in order to land a Forward Y. That said, this move has a surprising amount of range! Your best bet is to launch a Midair Y and use that to cover your approach. A counter-cancelled forward dash will prove to be useful, as it will get you closer whilst soaking up the abundance of projectiles coming your way. Machamp hates projectiles…
The biggest struggle, as a Machamp main, is dealing with projectile spam… Most of his attacks are slow and have outrageous amounts of lag. All in all, he’s about as mobile as a Shuckle with an Iron Ball, and has the hitbox size of a four-armed elephant. How are we supposed to home in on the enemy and land one of the aforementioned attacks? We pray… Oh, and we use a lot of shields and counter-cancels. Machamps slowly make their way towards camping opponents… Remember that Midair X flies over projectiles and, if you space it correctly, will be the perfect punish tool! Fight fire with fire—or rather, projectiles with projectiles—and use your Midair Y a lot. That flying fist has a lot of priority, and Machamp hovers in the air while shooting it out. This allows him to stay above most of your enemy’s projectiles. All of this is easier said than done.
Duel Phase
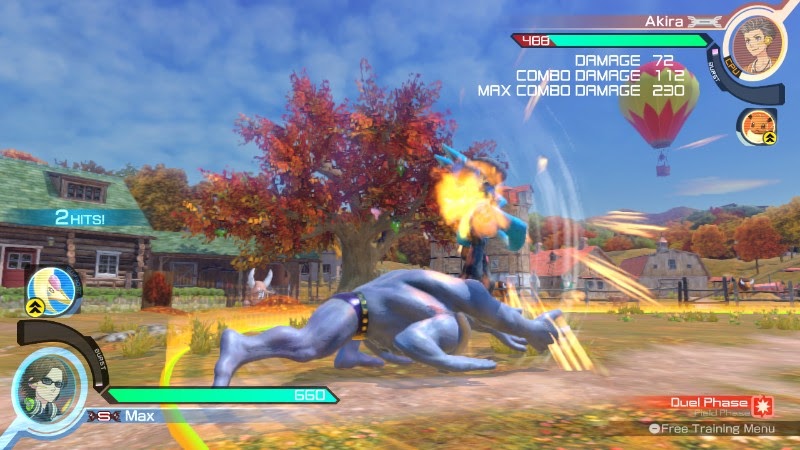
This is the fun part – or the annoying part, if your opponent continues to spam projectiles… Machamp has some awesome combos, most of which average at 180 damage! Most of these have brutal startup-lag, so you need to play very cautiously.
Down X X is the mother of all (painfully slow) combo starters! If your opponent gives you the opportunity to unleash this, then they have got to be one of the most incompetent trainers in Ferrum. Follow up with a Midair Y, then another Down X X. This will allow you to use just about any move you want! However, if the initial Down X X doesn’t connect, you are going to seem like the most incompetent trainer in Ferrum…
A somewhat safer alternative to Down X X is the charged Forward X! Not only does it start combos, it can also close the distance between you and a projectile spammer (or a non-projectile spammer, for that matter). Even if this move hits your opponent’s shield, you still have a few options… You can go for a grab, a Midair X, or a Down Y. If they don’t avoid this move, then you can use the aforementioned combo of Midair Y –> Down X X –> Any move you want. When uncharged, this move is much less powerful, but still does a good job of pressuring your opponent. All things considered, this is a very versatile attack!
Your Midair X is another combo starter. It gives you less options than the Down X X or Forward X does, but it has some counter attack properties, and it’s very easy to land! Okay, maybe not VERY easy… I use this move a lot; keep in mind that this set-up can become predictable. Make sure you mix it up with the others! Up Y Y is the simplest follow-up to a Midair X. If your opponent shields the initial hit, I recommend using one of the following: X+A, Down Y, or another Midair X. If you happened to fail to land a Midair X, they won’t expect you to use another one… and if they do, that stinks.
The last attack I’ll go over is the Up A. When playing offensively, it’s best to input forward after activating it. This will launch Machamp behind the opponent, where he’ll roll backwards, ready to combo! This move is so cool because it can cover so much distance; it functions as an anti-air move; and sets up one of the most stylish combos in Pokkén Tournament! If this move is shielded, try to catch your opponent off guard and let out a few Down Ys. Down Ys are always great for recovering from moves with end-lag. If the Up A isn’t shielded, check out the combo section to see what you can do!
Of course, there’s still the threat of a projectile-spammer… Machamp’s Forward X and Up-Forward A cover a lot of distance, as said before. Despite the usual ‘punch-punch-punch kill-kill-kill’ strategy, you’re going to have to play defensively… Shields are your best friend, and counter-cancelled forward dashes can help too. Take it very, very slowly… Another thing to keep in mind is that a few characters have ranged grabs (like Chandelure and Sceptile). Memorize the grab’s distance and jump when within that range!
Another problem Machamp faces is speedy characters… By ‘speedy’ characters, I’m referring to – well – the entire cast of Pokkén tournament. Against the particularly quick ones, you should play semi-defensively, and bait as many slow attacks as possible. Your Enhanced Neutral A and Forward X are fast and somewhat safe on shields, so use these plentifully!
Synergy Burst

Now that we’ve covered the basics, you may be wondering, “When should I use my synergy burst? How should I go about landing the burst attack?”
To answer the first question, I like to use mine when my opponent has less than two hundred HP left. That way I can finish them off with my burst attack! Some other situations to use it in (and this goes for every character) are when you have low HP and need a comeback, or when your opponent attempts a burst attack. The shockwave from the activation of your synergy burst will wither out their burst attack.
Before using your burst attack, you should take advantage of having Bulk Up permanently charged! This makes approaching a lot easier, since you have unlimited access to the Enhanced Neutral A. You can perform a few different combos, utilizing the Enhanced Down A as a powerful combo-finisher! Overall, this is awesome!
Landing the burst attack isn’t so easy… First of all, I find it much easier to land it in Duel Phase as opposed to Field Phase. I only ever attempt it in Field Phase if I shield an aerial attack from my opponent, and even then, they can get out of the way… Remember that the more moves you string together before the burst attack will weaken the burst attack’s potential… That’s lame. To avoid being lame, we simply use one move before activating our burst attack. There are a LOT of moves that combo into the burst attack: Down X X, Back X X, Forward X, Forward Y Y Y, Up-Forward A, and Back A. If your opponent shields a Midair X, you can probably break their shield with your burst attack… Probably.
Additional Info
ALWAYS HAVE BULK UP CHARGED – plain and simple. This is the one move that keeps Machamp from falling off the tier lists altogether. Unless it’s a small circular battling arena, you should always tap A at the beginning of the match. If you cause a phase shift, you should tap A. If you’re far away from your opponent, tap A, and if you land a Forward A in either phase, tap A.
Choosing a support Pokémon set is no easy task—it’s almost as difficult as using Machamp… If your opponent is using a character known for seemingly-endless projectiles, go with the Jirachi/Whimsicott set as a last-ditch effort to protect yourself from those dreadful ranged attacks. Cubone/Diglett can sometimes help Machamp land one of his attacks with end-lag, leading into a combo. Reshiram/Cresselia is a good set in general, since it’s always nice to have healing from Cresselia!
Allocate your skill points and choose your cheer skill based on your playstyle. I prioritize my skill points in defense, then attack, then synergy, and finally, support. That’s just how I play – you can spread these however you want and end up fine. I personally use the Synergy Cheer Skill. Why do I use that one? Because I chose that one a long time ago and have been too lazy to change it.
Combos

We’re moving onto my favorite section of the guide! All of Machamp’s combos fall into the ‘high risk, high reward’ category, which isn’t necessarily a bad thing, but it means you need to be careful!
Down X X –> Jump Forward –> Midair Y –> Down X X –> Down A
Don’t jump immediately after landing the Down X X. Time it so that Machamp’s fists will be lined up with the opponent for the Midair Y. Otherwise, you won’t be able to land the second Down X X! Once you land that, you’re home-free! Oh, and remember that the initial Down X X can be used interchangeably with the charged Forward X.
Midair X –> Up Y Y
There’s a chance I stole this one from the Combo Dojo… A pretty big chance, but hey – it’s an easy to use, high-damaging combo! There’s not much else to say about this one.
Up Forward A –> Down Y –> Down X X –> Jump Forward –> Midair Y –> Back A
This is the mother of all stylish combos! Here are a few tips to land this beast: land the Up Forward A BEHIND your opponent, carefully time that jump, and use the Back A immediately as you land! It’s a lot easier to pull off than it sounds. Just go to free training and perform it a few times!
X+A (Counter) –> Enhanced Neutral A
I can’t remember if this combo came from the combo dojo or not… It probably did. Anyways, this is one of the Enhanced Neutral A’s best uses! You’re bound to use a counter at some point, so you might as well max out your damage potential and throw in the Neutral A!
Forward Y Y Y –> Down X X
I use this combo much less than some of the other ones, but the Forward Ys make for a quick attack to stop a quick opponent. Make sure you don’t hit the Y button a fourth time when starting this combo. After landing the Down X X, you can go for an Up X or Down A. Sadly, a Midair Y will switch it to Field Phase before you have the opportunity to land a powerful combo-finisher.
(Opponent Against Wall) –> Down Y –> Up Y Y
Some ideal moves for knocking your opponent up against the wall are the Forward X, Down X X, or even a counter attack! Then, input the Down Y and Up Y Y as quickly as possible!
Back Y –> Enhanced Neutral A
This combo only works in Field Phase. I repeat: it only works in FIELD PHASE! Once the rock hits, you’re pretty much guaranteed to shift it to Duel Phase. As we know, Duel Phase is (almost) always a good thing!
For less practical (but equally stylish) combos, check out my thread HERE.
Conclusion

That about wraps it up… Thank you very much for reading my guide, and I hope you enjoyed it! We are the Machampions, my friends! We will keep on fighting ‘til the end!
If anyone has any questions or comments, please leave a post in the comments thread!
Cover image by Pebbles. Other images courtesy of The Pokémon Company.
Edited by bobandbill and Jake.